Three years ago, my cousin asked me to help him pick a prebuilt gaming PC. He had $700 and zero interest in touching a screwdriver. I talked him out of it. We built the thing together over a weekend, and when we booted into the first game, he just stared at the screen and said, "That's it?" That's the reaction most beginners have. Not because building a PC is hard—because everyone online makes it sound like brain surgery.
Here's the truth: assembling a budget gaming PC in 2026 is closer to following a recipe than performing surgery. The parts only fit one way. The manuals are decent. YouTube exists. What actually trips people up is choosing the right parts for their budget—and that's a decision problem, not a technical one.
This guide walks you through that decision, then through the actual build. No fluff, no "it depends" non-answers. Just what to buy, why, and where beginners waste money.
Key Takeaways
- $700–$900 is the sweet spot for a beginner budget build in 2026—below that, you're fighting compromises that hurt more than they save.
- Building it yourself typically saves 15–25% versus an equivalent prebuilt, but the gap shrinks when you factor in a Windows license and shipping.
- 16 GB of RAM is enough for nearly every game right now. 32 GB is a "buy once, cry once" move, not a necessity.
- The GPU eats 35–45% of your budget. Everything else serves it.
- Your first build will take 2 to 4 hours. Your second will take 45 minutes.
- Buying one used part—usually the GPU—is the single biggest cost saver, and also the single biggest risk.
What is a good budget for a beginner gaming PC?
$700 to $900. That's the honest answer, and I'll defend it.
Below $600, you're making real sacrifices: a weaker graphics card, half the storage, a power supply you shouldn't trust with a house fire. The machine works, but it ages fast—and you'll be upgrading within a year, which defeats the purpose of "budget."
Above $1,200, you're no longer in beginner territory. You're buying performance you probably can't use yet on a 1080p monitor.
Why the $700–$900 range makes sense
At that price, you're targeting 1080p gaming at 60+ frames per second on high settings. That's the resolution most beginners actually play at, because their monitor is a hand-me-down or a cheap 24-inch panel.
Spending more only pays off if your monitor can show it. A $1,500 PC on a 60 Hz screen plays exactly like an $800 one.
Here's how a typical $800 budget splits:
| Component | Typical spend | What to prioritize |
|---|---|---|
| Graphics card (GPU) | $280–$360 | VRAM amount and driver maturity |
| Processor (CPU) | $120–$170 | Enough cores, not the fastest clock |
| Motherboard | $90–$130 | Socket support, one M.2 slot minimum |
| RAM | $45–$70 | 16 GB DDR4 or DDR5, dual-channel |
| Storage (SSD) | $50–$80 | 1 TB NVMe, no spinning drives |
| Power supply | $60–$90 | Never cheap out here |
| Case | $50–$90 | Airflow over looks |
| Windows license | $0–$120 | See the section below |
Add it up and you land between $700 and $900. The line items I refuse to compromise on: the power supply and the SSD. A cheap PSU can take your whole build down with it. A mechanical hard drive in 2026 is a self-inflicted wound.
Is it really cheaper to build your own gaming PC?
Usually yes. But not by as much as the internet claims, and the gap is shrinking.
When I compared my own parts list against three prebuilts with matching specs, the DIY route came out roughly 18% cheaper. That's real money—about $150 on an $800 build. But two things claw that back.
The hidden costs nobody mentions
- Windows. Prebuilts include it. You don't get it for free unless you're comfortable with an unactivated install, which has cosmetic limits but no functional lockout.
- Shipping. Ordering from five retailers means five shipping charges. Prebuilts ship once, often free.
- Your time. Three hours, minimum, on a first build. Add troubleshooting if something doesn't POST.
- Warranty friction. A prebuilt comes with one warranty covering everything. Build your own, and each part carries its own return window.
The counter-argument is stronger than it looks: prebuilts use proprietary motherboards, weak power supplies, and single sticks of RAM that quietly halve your bandwidth. You can't see those cuts on the spec sheet, but you feel them two years later when you want to upgrade and nothing fits.
DIY wins on upgradeability more than on price. That's the honest case.
When a prebuilt is actually the better buy
If you find a prebuilt on clearance with a real GPU inside—not an integrated one, not something labelled "GT" with a number that means nothing—and it's within $100 of your DIY list, take it. The time you save is worth the delta.
What you should never do is buy a $500 prebuilt with no dedicated graphics card. That's not a gaming PC. That's an office computer wearing a costume.
All parts needed to build a gaming PC
Seven components, plus a few things people forget to put on the list.
- CPU — the processor. Buy one that matches your motherboard's socket.
- Motherboard — the board everything plugs into. Check the socket and the chipset.
- RAM — two sticks, not one. Dual-channel matters more than capacity at 16 GB.
- GPU — the graphics card. This is where your money should go.
- Storage — an NVMe SSD, 1 TB.
- Power supply — 550–650 W is plenty for a budget build with a 80+ Bronze rating or better.
- Case — anything with a mesh front panel and space for your GPU length.
Now the forgotten items: a Phillips-head screwdriver (magnetic tip helps), thermal paste if your cooler doesn't include pre-applied paste, zip ties or velcro straps for cable management, and a monitor, keyboard, and mouse if you don't already own them. That last one is the classic beginner budget hole—people plan a $800 PC and forget they need a $120 screen to use it.
Does brand matter for SSD and RAM?
Less than you think. For RAM, buy the speed your motherboard supports at the capacity you need, and don't pay a premium for heatsinks you don't need—unless your case airflow is genuinely bad. For SSDs, stick to brands with a track record on controllers; the failure mode of a no-name drive is losing everything you saved, plus the drive.
I've used cheap RAM in three builds without issue. I have not been as lucky with cheap SSDs.
Can you provide a beginner's guide to building a gaming PC?
Yes—and here it is, in the order you should actually do it.
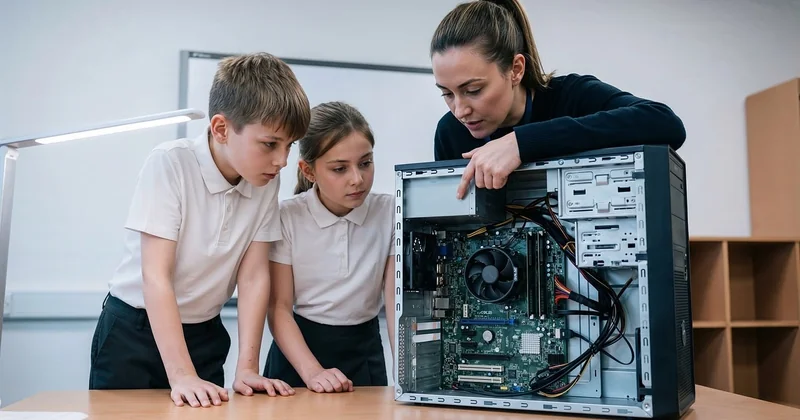
Step 1: prepare your workspace
Build on a table, not carpet. Carpet generates static, and static kills components. Touch the metal chassis of your case before handling anything sensitive—that grounds you. Keep the motherboard on top of its own box while you work on it.
Step 2: install the CPU and cooler outside the case
The motherboard goes in the case last, not first. Install the CPU into its socket—align the triangle marker, lower it gently, close the retention arm. No force. If it doesn't drop in with almost no pressure, it's misaligned.
Then mount the cooler while the board is still on the table. Much easier than reaching into a cramped case.
Step 3: install the RAM
Two sticks go into slots 2 and 4—check your manual, because the numbering isn't always obvious. Push until both clips click. If one side doesn't click, it's not seated.
Step 4: mount the motherboard into the case
Screw the standoffs first. Then the board, then the screws—hand-tight, not gorilla-tight. Overtightening cracks traces, and you won't know until nothing boots.
Step 5: install storage and power supply
The NVMe drive slots directly into the motherboard, usually under a small heatsink cover. The PSU drops into the bottom of the case, fan facing the vent. Route the big 24-pin and CPU power cables before you install the GPU—it gets crowded after.
Step 6: install the graphics card
Pop the PCIe slot cover, push the card in until the latch clicks, screw it to the case. Plug in the power connectors from the PSU. If your card needs two, use two separate cables—not one cable with a daisy chain, unless the card is low-power.
Step 7: first boot
Plug the monitor into the GPU, not the motherboard. Press power. If nothing happens, don't panic—check that the power supply switch on the back is on, that the RAM is fully seated, and that the front panel connectors are in the right pins.
My first build didn't boot. I'd forgotten the CPU power cable. Took me forty minutes to figure out.
Is 32 GB RAM overkill for gaming?
For most players right now, yes. 16 GB handles every current game at 1080p without issue. You'll rarely see a game use more than 10–12 GB on its own.
That said, 32 GB isn't a waste—it's insurance. Three situations where it pays off:
- You keep a browser with 40 tabs open while gaming. That's not a game problem, that's a you problem, but it's real.
- You stream, record, or run a second machine's worth of background apps.
- You plan to keep the PC for five years without touching it again.
My honest recommendation: buy 2×8 GB now, keep two slots free, and add another pair later if you ever need it. RAM prices fluctuate, and buying it twice at 16 GB costs less than buying 32 GB upfront for headroom you never use.
One caveat: if you're building on a platform where the memory controller prefers four matched sticks, check compatibility. Mixing kits later can cause instability, and that's a headache no beginner deserves.
Where beginners actually waste money
A few things I see repeatedly, including in my own early builds:
- An expensive CPU paired with a weak GPU. In a gaming PC, the GPU is the bottleneck 90% of the time. Spend there first.
- RGB everything. Lights don't render frames.
- A 1,000 W power supply. A budget build draws maybe 300–400 W under load. You're paying for a number you'll never use.
- A "gaming" motherboard. The word is marketing. What matters is the socket and the chipset.
- Buying used without testing. A used GPU is the best deal in PC building—if you can verify it works before handing over money. Ask for a benchmark screenshot, or meet in person and test it.
The pattern here: beginners spend on parts they can show off and skimp on parts that determine reliability. Flip that instinct and your build improves immediately.
The part nobody tells you about
Your first build will feel uncertain right up until the moment it posts. Then you'll spend the next week watching your temperatures like a nervous parent.
That passes. What stays is the thing that pulled me into this hobby in the first place: knowing exactly what's inside the box, and knowing that when something breaks, you can fix it yourself for the price of one part instead of the price of a new machine.
Budget builds aren't a compromise. They're the most honest way to learn what actually matters in a computer. The $800 machine you assembled, troubleshooted, and tuned will teach you more than a $2,000 prebuilt ever could—because the second one never asks you a single question.
So here's the real question: what's stopping you? If it's fear of breaking something, buy a used case and a cheap board and practice on those. If it's the money, start with the GPU and build around it over a few months. Either way—the parts only fit one way. You'll figure it out.